Getting Help
Accessit has a dedicated support team that can be reached by email or phone. To contact support:
- Login to the Accessit Library Customer Portal to submit a ticket,
- Send an email directly to support@accessitlibrary.com
- If you have an urgent query, call our team in
New Zealand on 0800 542 727
Australia on 1800 707 561
Europe and the United Kingdom on +44 (0) 203 6179908
Accessit Library Customer Portal
Click here to go to the Customer Portal.
The articles are regularly updated to reflect the latest changes in Accessit and the portal is designed to be used as a first port of call if you have a question.
You may have received an email inviting you to register for the portal, if you have not, please contact our support team. When you receive the email, click on Accept the Invitation and you will be taken to the portal to create your own password. This is distinct from the username and password that you will use to login to Accessit itself.
Signing into the portal will take you straight into the Home screen where you can search using keywords. For example, searching for overdues will give you all the articles and videos that we have on overdues.
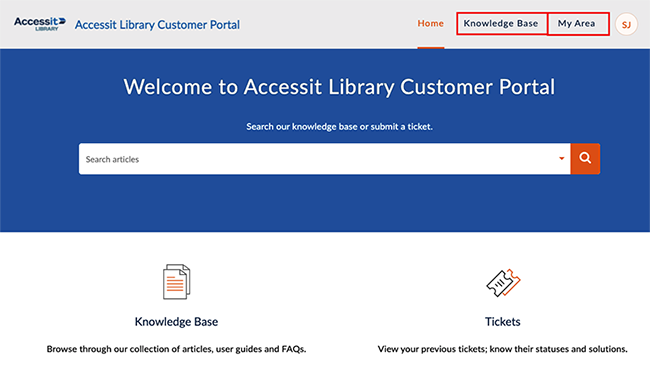
Clicking on the Knowledge Base tab will give you the option to browse Topic areas or enter a specific search term.
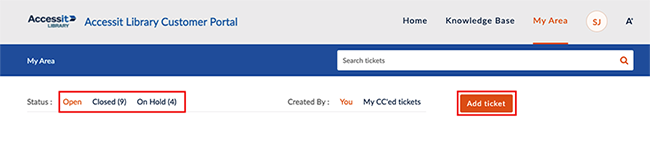
Going to My Area gives you the option to submit a ticket (help request) and track the status of any current tickets you have with us. You can also edit your details from My Area.
You can get to the portal at any time by going to the Help menu within the Accessit Management App. We also recommend bookmarking this site on your browser.
ALeC – Accessit Library eLearning Centre
Click on the link below for ALeC.
Accessit Library eLearning Centre
Once you have worked through the first two courses, you will have the knowledge for the day to day running of your library, while the portal provides answers to your questions as they arise. These two resources are designed to complement each other.
The courses are sequential, with quizzes and interactive games along the way to test your knowledge. At the successful completion of Courses 1 and 2, you will receive a certificate. To register for ALeC you must have a library role within the school, not IT support or school administrator.
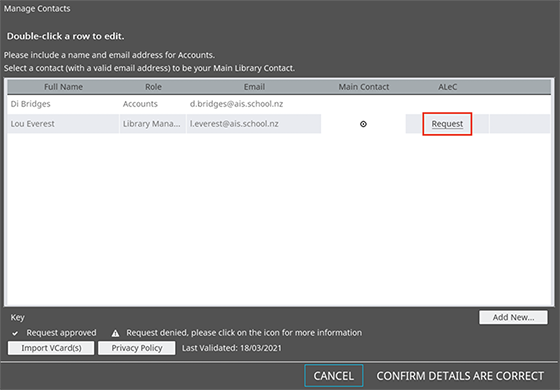
To register for ALeC, open Accessit and go to Help > Update your Contact details. Add yourself as a contact and select a library role from the dropdown. Save your new contact, then click on Request in the ALeC column. Once you have confirmed and saved your details, the request will be sent to our ALeC team and you will receive an email inviting you to join. Setting up your registration for ALeC is distinct from your login to Accessit and to the Customer Help Portal.
You can log into ALeC at any time through the Accessit Management App by going to Help > Accessit Library eLearning Centre (ALeC) and we recommend you bookmark this site on your browser for easy access.
Create your User Logins
Library Staff login
You may have been given your school’s username and password to log into Accessit. Once you have logged in, it’s advisable to create a personal login for yourself and any other library staff members who should have full access as a Library Administrator in order to circulate, catalogue, manage overdues, borrowers etc.
Circulation Desk Login
This is the login that will be used for Accessit on any computer staff and / or students use for circulation. Access to the rest of the management functionality is limited by default and can be customised to suit the needs of your school or organisation.
Create a User Login
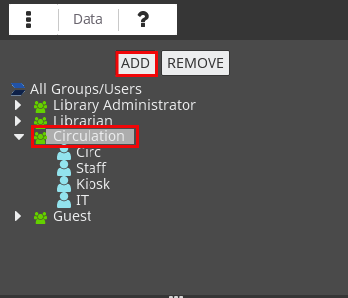
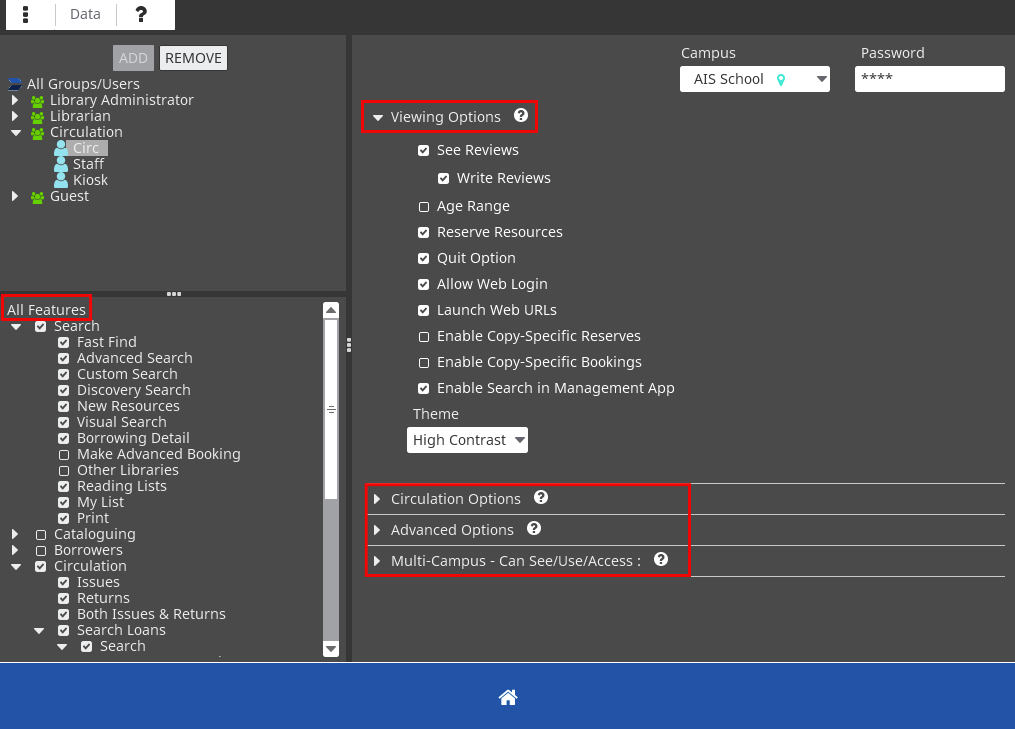
To create a User, go to Library Setup > User Settings > click on the User Group that you wish to create your new User under. The User Group is indicated by a green icon, individual Users are indicated by a blue icon.
Once the desired User Group has been selected, click on Add.
Type your new Username into the New User field > Enter. In the password pop up, type your password and retype to confirm > Enter.
Note that passwords are case sensitive and administrative passwords must meet security requirements.
You can edit the features and permissions for your User as you wish by ticking or unticking the appropriate checkboxes. If you are not sure, the default settings for Administrator and Circulation will be adequate to start with.
For further information please click on the links below
Adding a Borrower
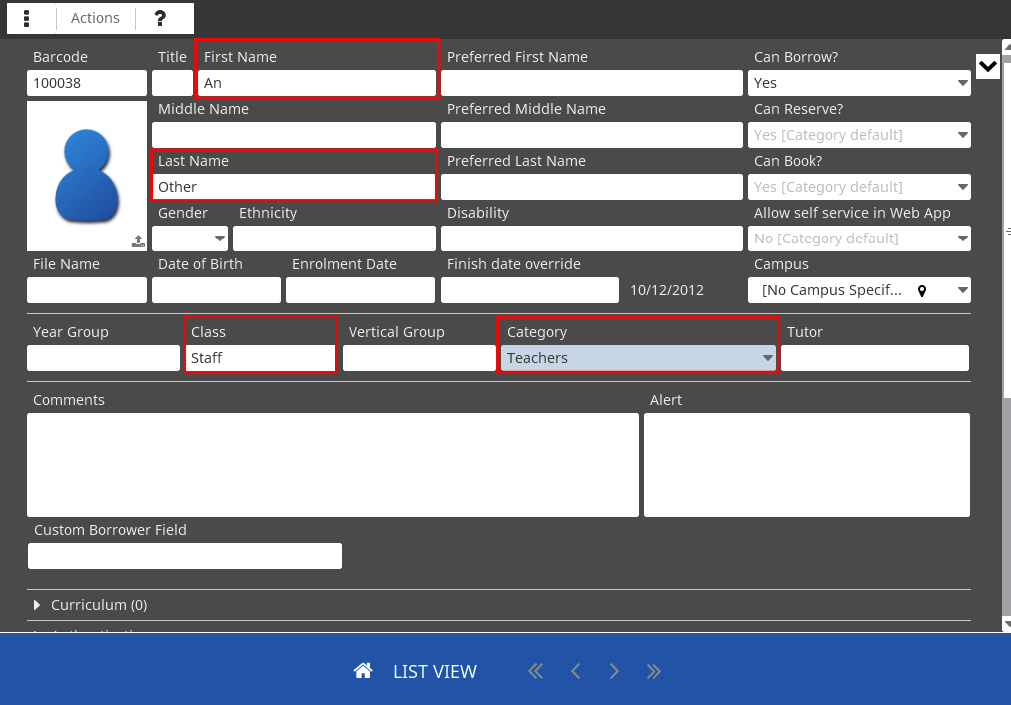
To add a Borrower
Go to Borrowers > Borrowers > Create Borrower.
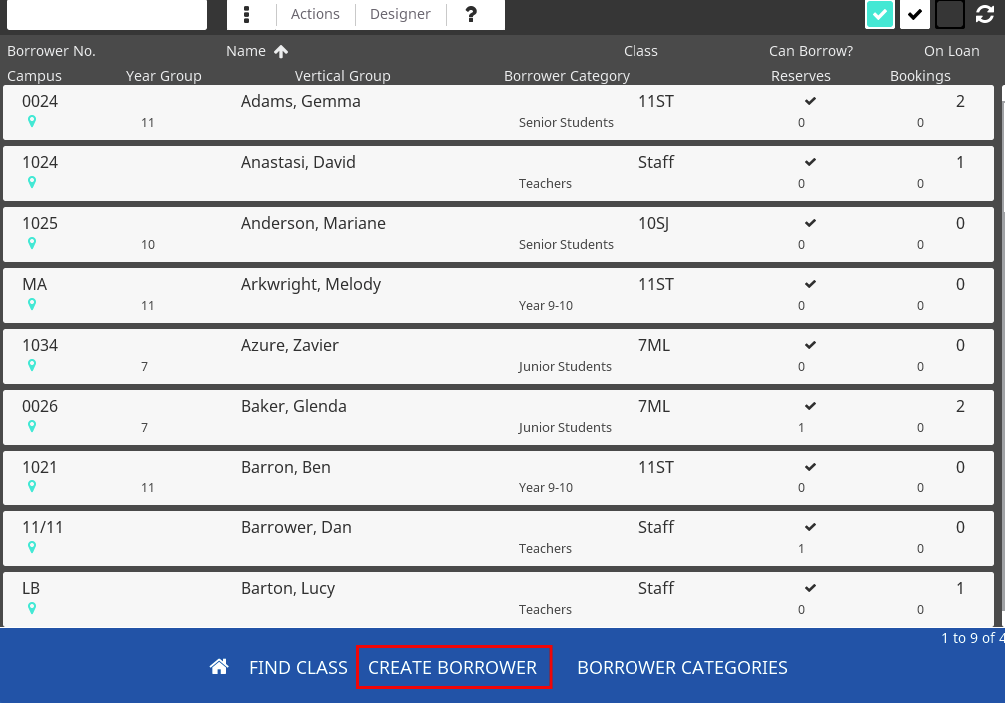
You can add in a specific barcode for this borrower, or have Accessit auto assign a barcode. Barcodes can be changed in the future if needed.
Now fill in the details for your borrower. You can fill in as much or as little as is needed. The key fields are first name, last name, Class, Category. This will be enough to find the borrower and issue to them.
Click on List View to save and return to your list of borrowers.
For further information, please click on the links below
Circulating in Accessit
- CTRL + I (CMD + I) to issue books or,
- CTRL + R (CMD + R) to return books.
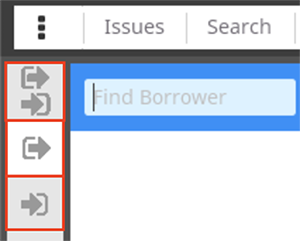
Alternatively, you can click on Circulation and select your action.
In any Circulation screen, you can use the buttons on the left to switch between the split Issues and Returns mode, Issues mode or Returns mode.
Issuing an Item
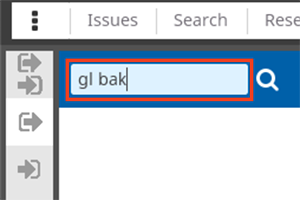
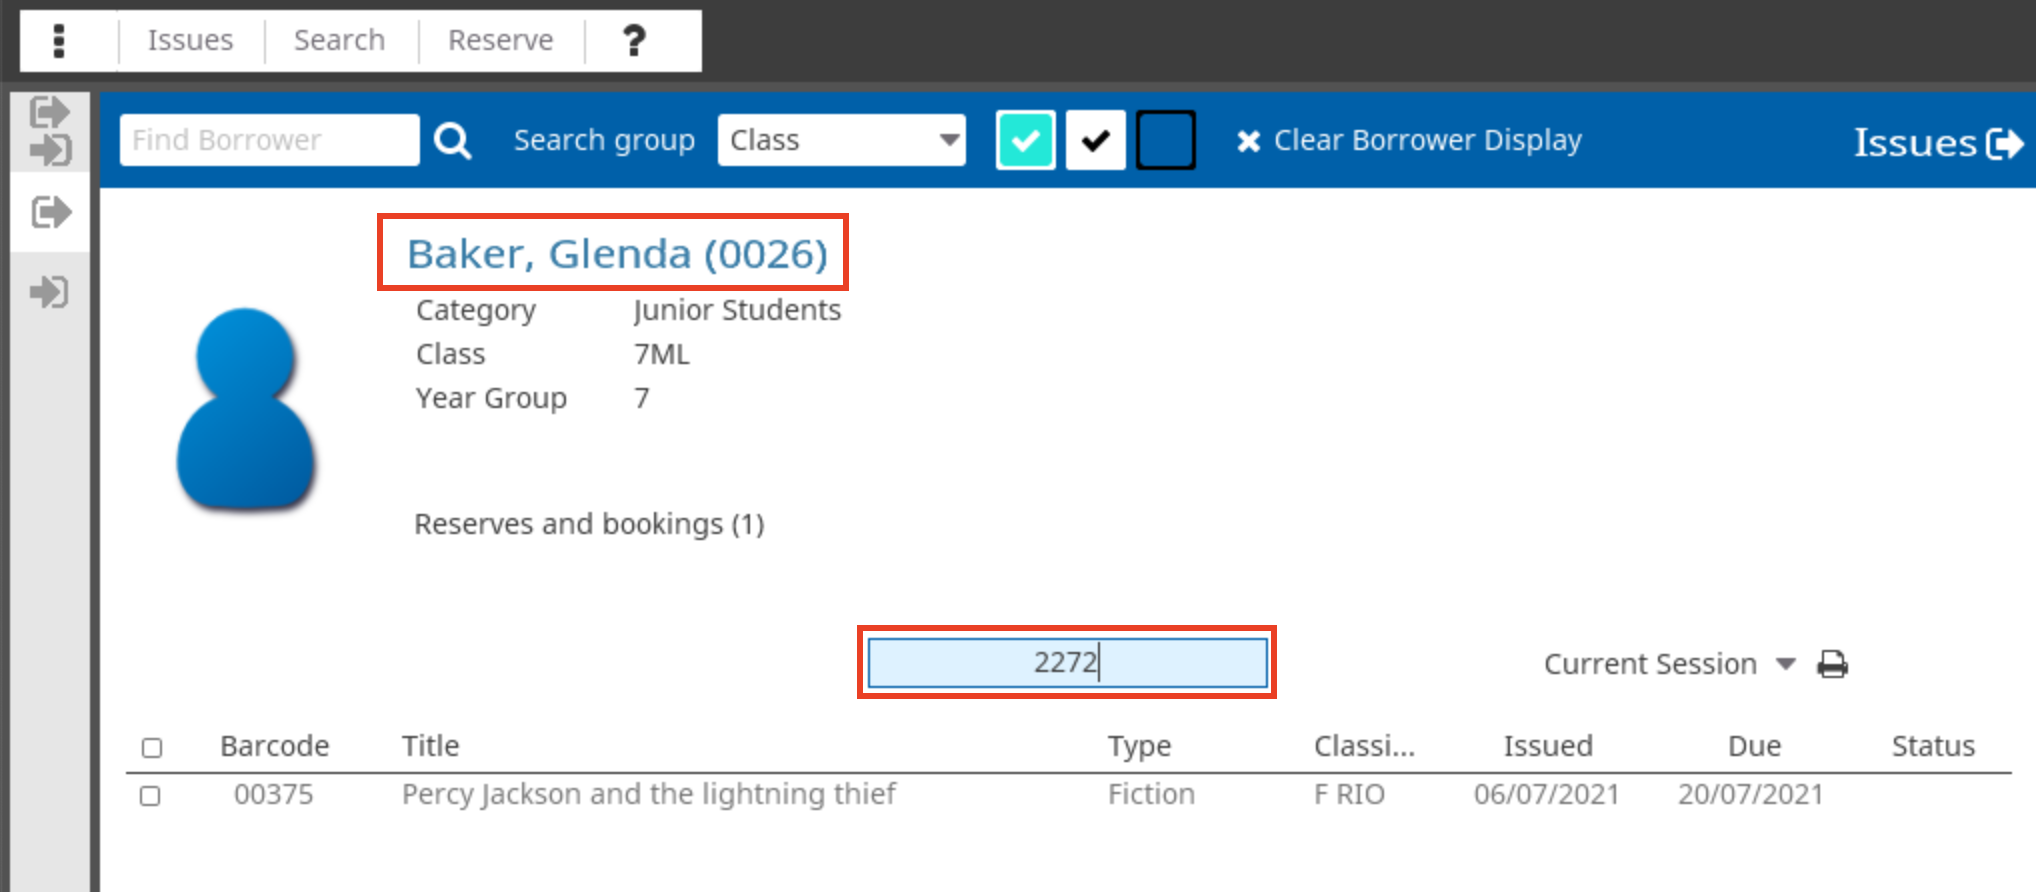
- In the Issues screen, type a borrower’s name or truncation of their name into the search box
at the top, then press Enter on your keyboard, or scan their barcode.
- With the borrower’s record open on the issues screen, scan the book barcode into the issues
box or type the barcode and press Enter on your keyboard.
Note: Whether you’re issuing or returning books, make sure to scan or type your own library barcode, usually printed on a label stuck on the book, not the publisher’s ISBN barcode, which is printed directly onto the lower back cover.
Renewing an Item
If you wish to renew a book a borrower already has on loan, follow these steps.
- From the Home screen, click CTRL + I (CMD + I) to go straight to the Issues screen.
- Open the borrower record either by scanning the borrower barcode into the search box at the top, or type their name and press Enter on your keyboard.
- Tick the selection box by the book/s to renew and click the Renew button at
the bottom.
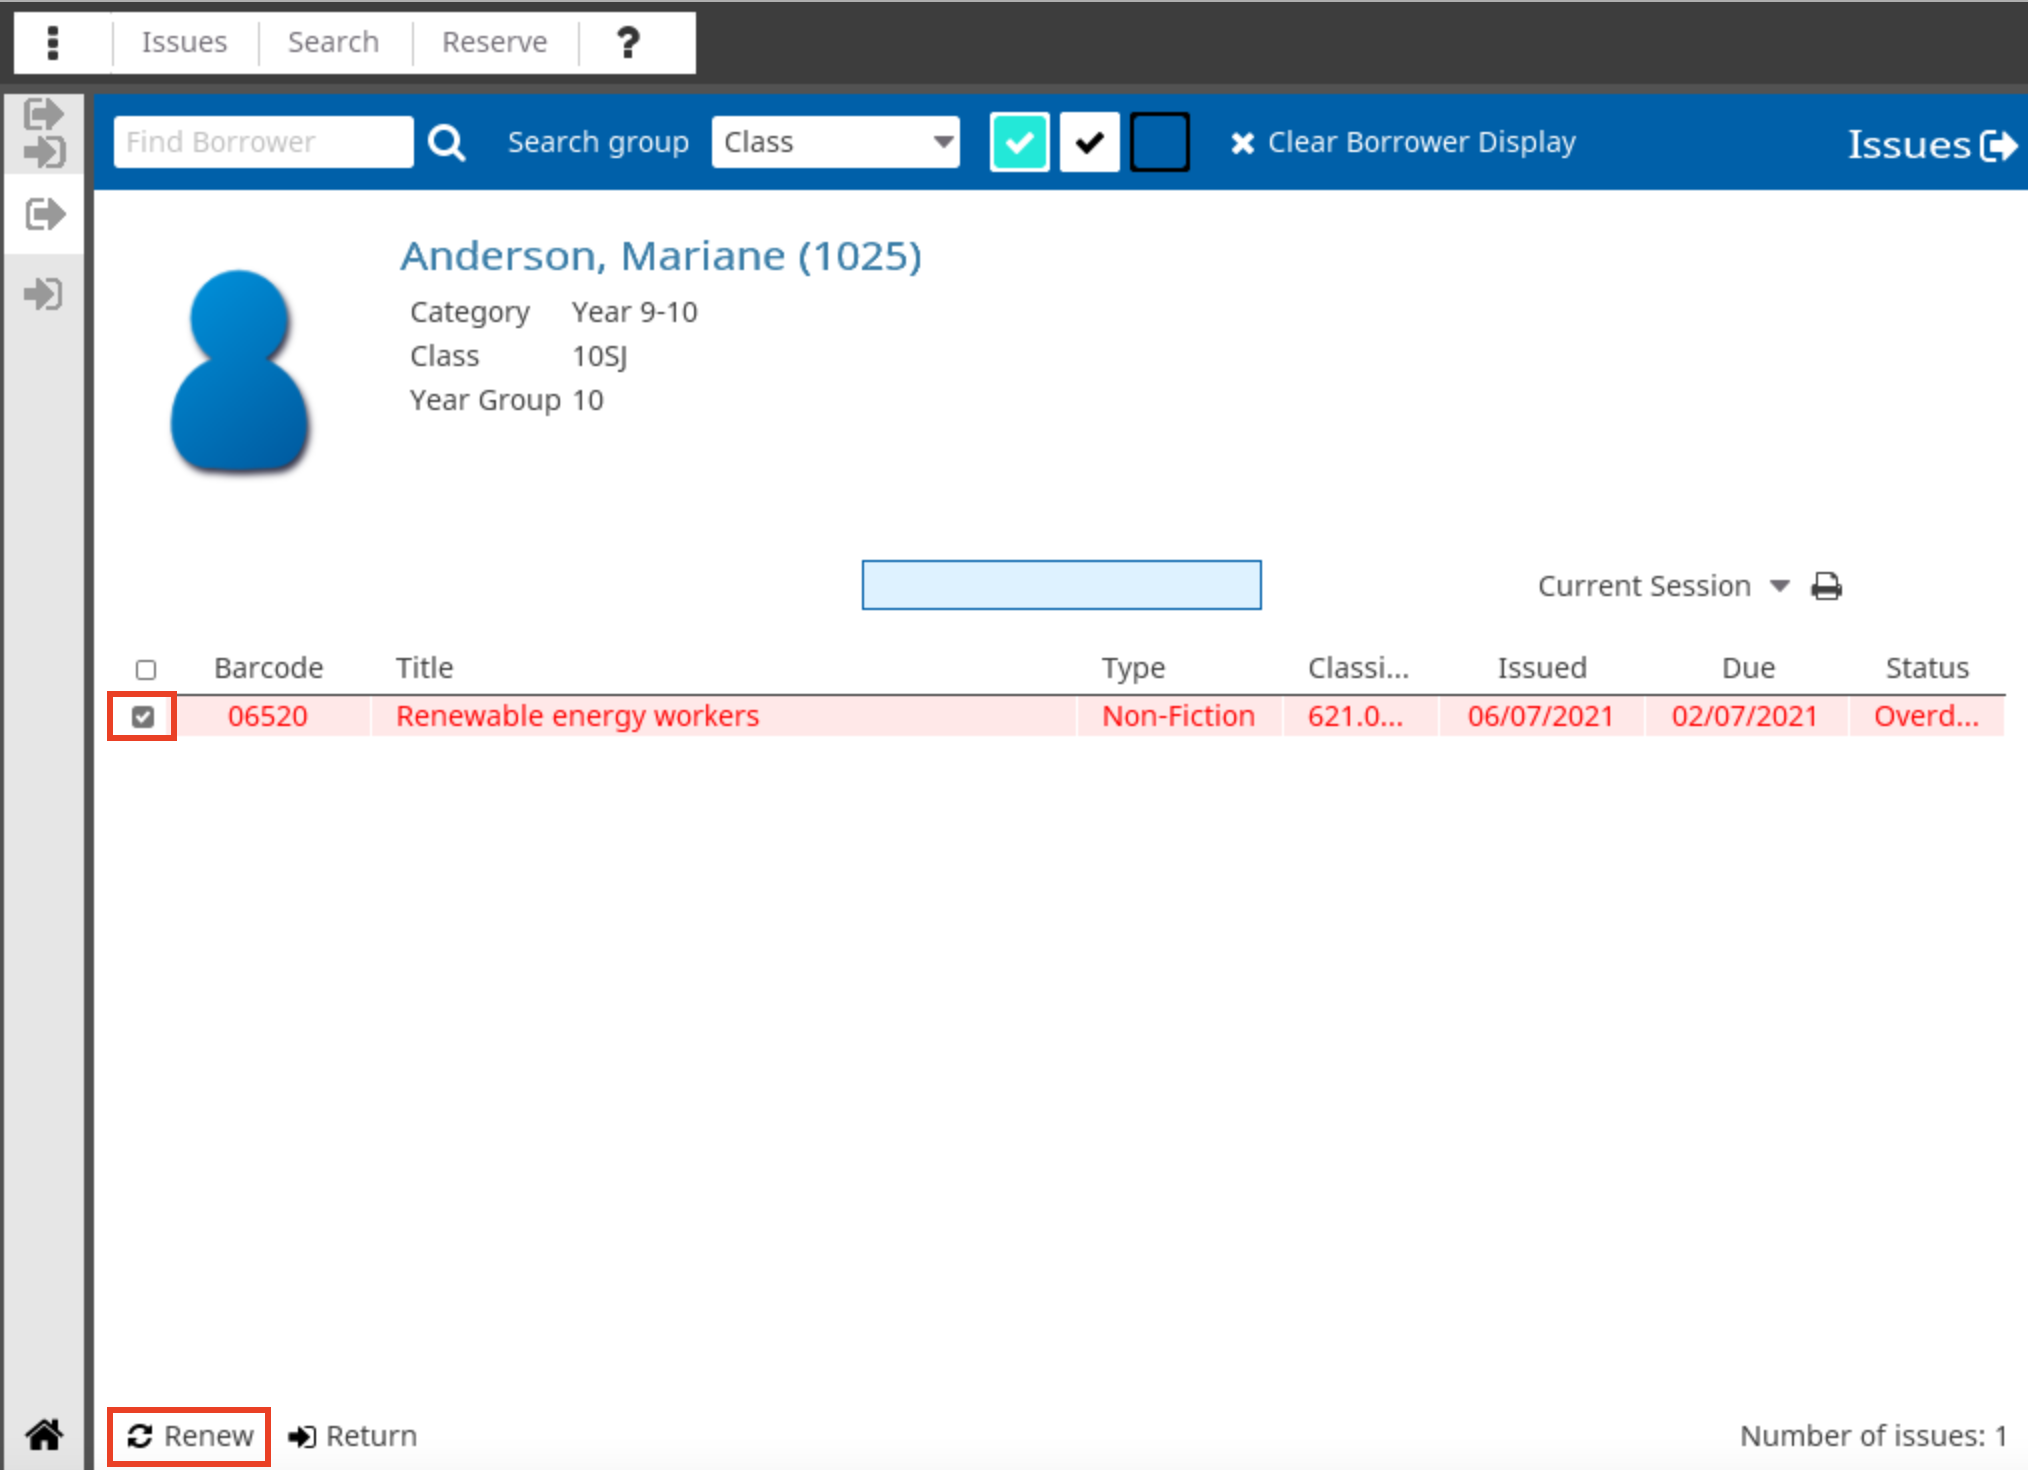
Note: If the borrower has reached the renewal limit, they will not be permitted to renew. If you wish to allow them to renew, you have the option to enter the Override password, if you know it.
Returning an Item
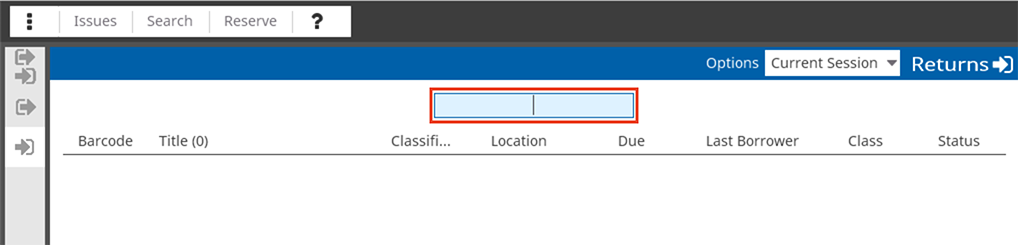
- From the Home screen, click CTRL + R (CMD + R) to go straight to the Returns screen.
- Scan the school’s barcode into the Barcode to return box, or type it in and
press Enter on your keyboard.
For further information, please click on the links below
Download our printable PDF guide to Circulation from the customer portal here.Automated Cataloguing
You can catalogue a batch of books at a time. We recommend no more than 20 or 30 at any one time. Go to Cataloguing > My Catalogue > Automated Cataloguing.
If your system is set to use pre-printed barcodes make sure the Auto Assign box is unticked. Scan the ISBN barcode from the back of the book (or type in the ISBN and press Enter), then scan your pre-printed book barcode. Repeat this for each item in your pile.
If you normally print your own barcodes and the Auto Assign box is unticked, simply tick it and scan the ISBN. It will scan and drop down into the box below.
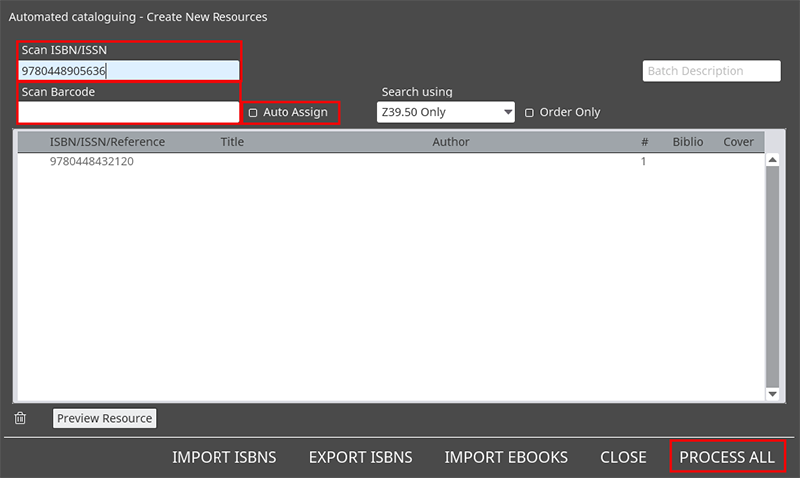
Once you have completed scanning all the items in your pile, click Process All.
On the Configuration screen that displays, check Create copies for these MARC records is ticked, click Process.
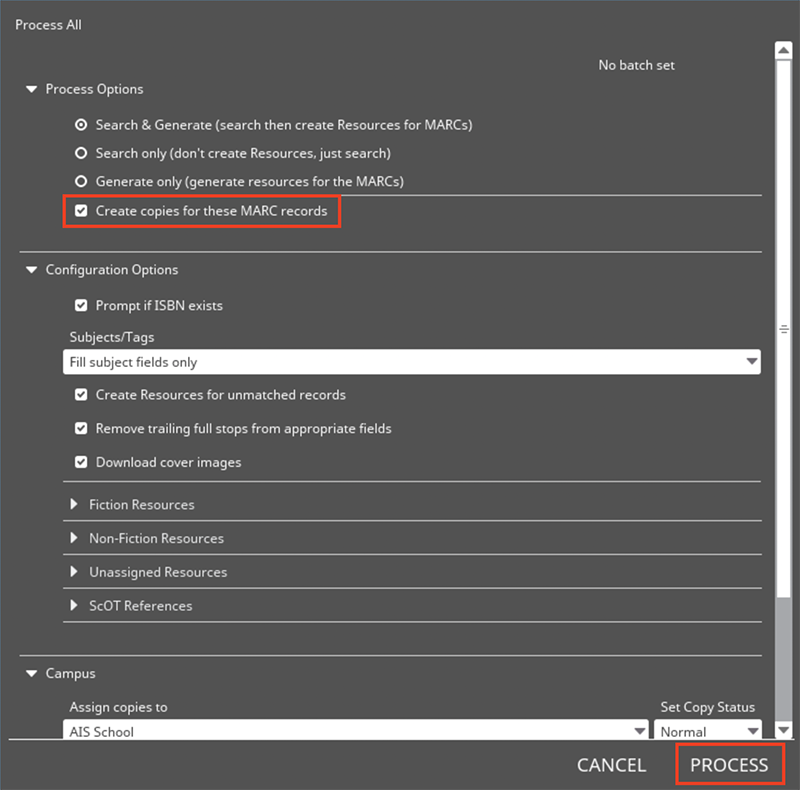
Accessit will now check for matches for those ISBN’s in your z39.50 servers. Where it can find a match, it will pull the MARC record in and create the resource and copy record for you.
Editing your new records
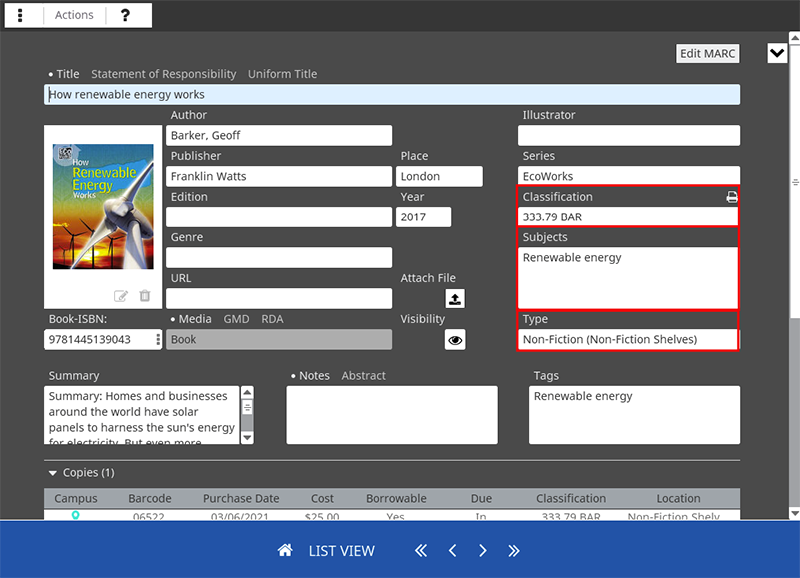
Once your records have been generated, they will appear as a list on screen and you will be able to double click into each record to check and edit any details that you wish.
The Resource Record
Double clicking into one of the records takes you to the resource record. This is the bibliographic information, or resource information that is the same for every copy of this title that you may have. You can add or edit information here to suit your library, such as subject headings, classifications, type etc.
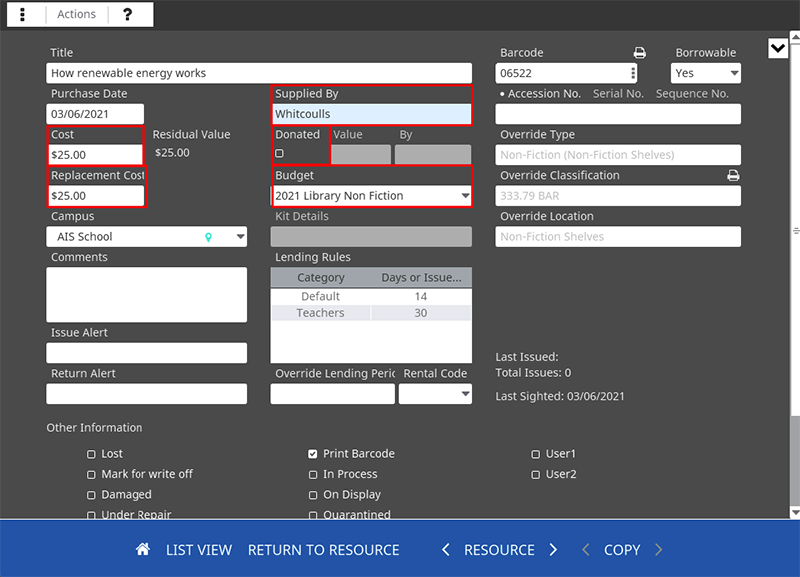
The Copy Record
When you are happy with the resource record details, open the copy record by double clicking anywhere on the copies line. The copy record shows information that is unique to each copy in your library, such as barcode, purchase date and cost etc.
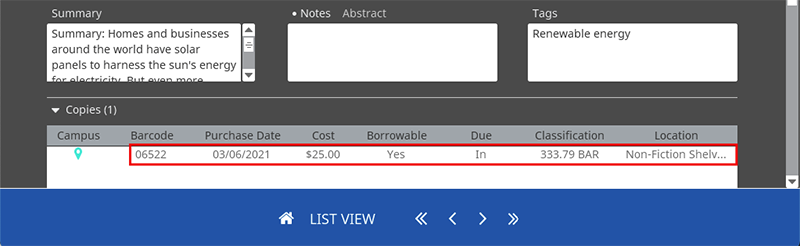
You can add in any relevant details for this particular copy, such as purchase cost, replacement cost, supplier, budget, whether it was donated etc..
Clicking on List View will save any edits you have made and return you to the resource list where you can move onto the next record.
For further information, please click on the links below
Download our printable PDF guide to Automated Cataloguing from the customer portal here.